The Best Floor For A Van: Hybrid Flooring
Hybrid flooring has a lot going for it.
Making it a great flooring solution in a van build.

Before we found hybrid flooring, We had Been on the flooring hunt for a while.
And had sifted through tons of samples in flooring shops to compare appearance, durability, and price (both new and old!).


The Flooring options We looked at included:
Vinyl sheets — Easy to install, but don’t necessarily look as realistic as some of the other flooring options.
Vinyl planks — A popular easy-to-install choice, but we heard some complaints from others about the durability.
Hardwood planks — The timeless option, but it’s heavy, thick, and very speno $$. Despite that, we would strongly consider a thin hardwood for the next build (we love natural wood)!
Laminate planks — Often used in households, but it’s water resistant not waterproof.
Carpet — An inexpensive option, but it can trap dirt and odours. This was an important consideration as we love the outdoors (wet, muddy, sandy etc.) and are hopefully adding a puppy to the mix one day too!
Plywood — This can be used as both the subfloor and finished floor, but it’s perhaps not as durable as other options and it’s a specific aesthetic.
Cork — A sustainable, renewable material and sound dampener. However, it’s quite a bit more expensive and needs more maintenance.
Rubber — A simple solution, often used in the “garage” in the van rather than throughout the van.
Lino — A classic in the Aussie home, but it can look a bit plastic-y.
And then we came across hybrid flooring, and it seemed to check all the boxes.
Why choose Hybrid Flooring for A van?
Hybrid flooring seemed to us to be the perfect combination between vinyl planks and laminate planks:
It’s thin – Ours is just 6.5mm thick.
It’s waterproof – Unlike the laminate planks which are water resistant only.
It’s aesthetic – The print looks quite realistic and feels good.
It’s durable – Apparently it’s “lifeproof” and more durable than something like vinyl.
It’s light-ish – Especially compared to something like hardwood.
It’s not toooooo expensive – Although it is pricier than something like vinyl or rubber.
It’s easy to clean – Which perfect for “outdoor living” in a van.
There was a lot to love, so we decided to go for it.

The layers of hybrid flooring
We ended up buying four boxes of Godfrey Hirst Apollo XL (in Alpine Gum) for the van.
We actually found it at the tip.
Well, the first box anyways.
Van building — like any type of building — generates a lot of waste.
Plastic wrapping, offcuts, unrecyclable materials, tools, fuel, and more. But a big reason for choosing vanlife is to be more sustainable and environmentally friendly. However, finding recycled materials for a van build is challenging.
Everything seems to be a custom fit and we haven’t really been able to find many things second hand.
So when we found a box of hybrid flooring at the tip, we got very excited.
It was in perfect condition and cost only $5, saving us almost $100!
It was a slightly different colour (Blackbutt — which has more yellow undertone) from the one we wanted (Alpine Gum — which is a softer brown), but we knew we could just install it under the cabinetry so it would never be seen anyways.
Then we bought the three more new boxes in the right colour from Floorworld in Geelong, Australia.

The dimensions of our planks are 180mm wide x 1500mm long x 6.5mm thick.
Installing Hybrid Flooring in a van
Hybrid flooring is quick and easy to install — if you know what you are doing.
Of course, we didn’t know what we were doing...
so it was not quick and it was not easy.
But it was a lot of fun working it out!
Following the instructions from the manufacturer helped a lot.
Here’s our process:
1. Floor prep
By this point, we had already installed our sound deadening and plywood subfloor.
It just needed a bit of a clean, especially with our foster dog Zeasar around!
We also had to make a decision:
Lay the entire floor before installing any cabinetry
Install the cabinetry and then lay the flooring
There are pros and cons for each, but we decided to lay the entire floor. Mainly because we thought this would be easier and faster as there aren’t as many obstacles to dodge or cuts to make. It also helps keep the subfloor sealed and the floor clean with less build-up of dirt in any gaps.
This comes at a slightly higher cost, but we felt it was better for the protection and ease it provided.

Just a tip: Make sure the subfloor is level before proceeding as otherwise it can cause a squeaky floor!
2. Layout
Before starting the install, we “acclimatised” the hybrid flooring by leaving it in the van for 24 hours like the manufacturer suggested.
The next day, we planned the layout — a key step in getting a good outcome we’d read.
This is because manufacturers repeat the print on the hybrid planks, so they recommend mix and matching the placement to avoid laying duplicates close to each other.
There are lots of different patterns to lay the planks, including:
50% offset
Varied offset
Staggered
Herringbone
Random
And more
We chatted with a few of our “van consultants” (aka my parents), and we laid out all the planks and swapped them until we had a layout that we liked.
Ultimately, we did a combination of a varied offset and a random pattern.


A lot of planning going on here! (Note, the pattern didn’t matter as much for areas that are under cabinetry)
We made sure to place the Blackbutt planks (our odd box) where cabinetry would cover them — which was just behind the driver’s seat in our case.
3. Prepare the tools
There is a whole lot of tools required for installing hybrid flooring.
It’s a good idea to get them ready so they are on hand as needed.
What we used:
4x boxes of hybrid flooring (acclimatised)
Measuring tape
Mallet
Pencil
Microfibre cloth
Construction glue
Factory bolts (already in the van)
Jigsaw and square
Mitre saw/circular saw
It’s probably easier to use a mitre saw or circular saw for any straight cuts for the flooring, but we didn’t have one at the time! We used a jigsaw and square instead. The jiggy came in handy for all the curved cuts as well, such as round the wheel arches.
4. The Install
As it was our first time doing this, we tried to be as prepared as possible.
To get a sense of what to do, we read the instructions from Godfrey Hirst.
We also perused articles available online and watched tons of videos.

It seemed so simple: plan, cut, lay it out.
But the process took longer than either of us would like to admit.
Although it would be a lot easier next time!
This is what we did:
Measure the space
For our van, we decided to start at the front of the van behind the driver’s seat and work across to the sliding door.
We’d need 10 rows with just under two planks in each row.
And we made sure to plan for an ~6mm gap between the van wall and the planks to accommodate any expansion of the planks (as per the manufacturer’s instructions).
Cut the First plank
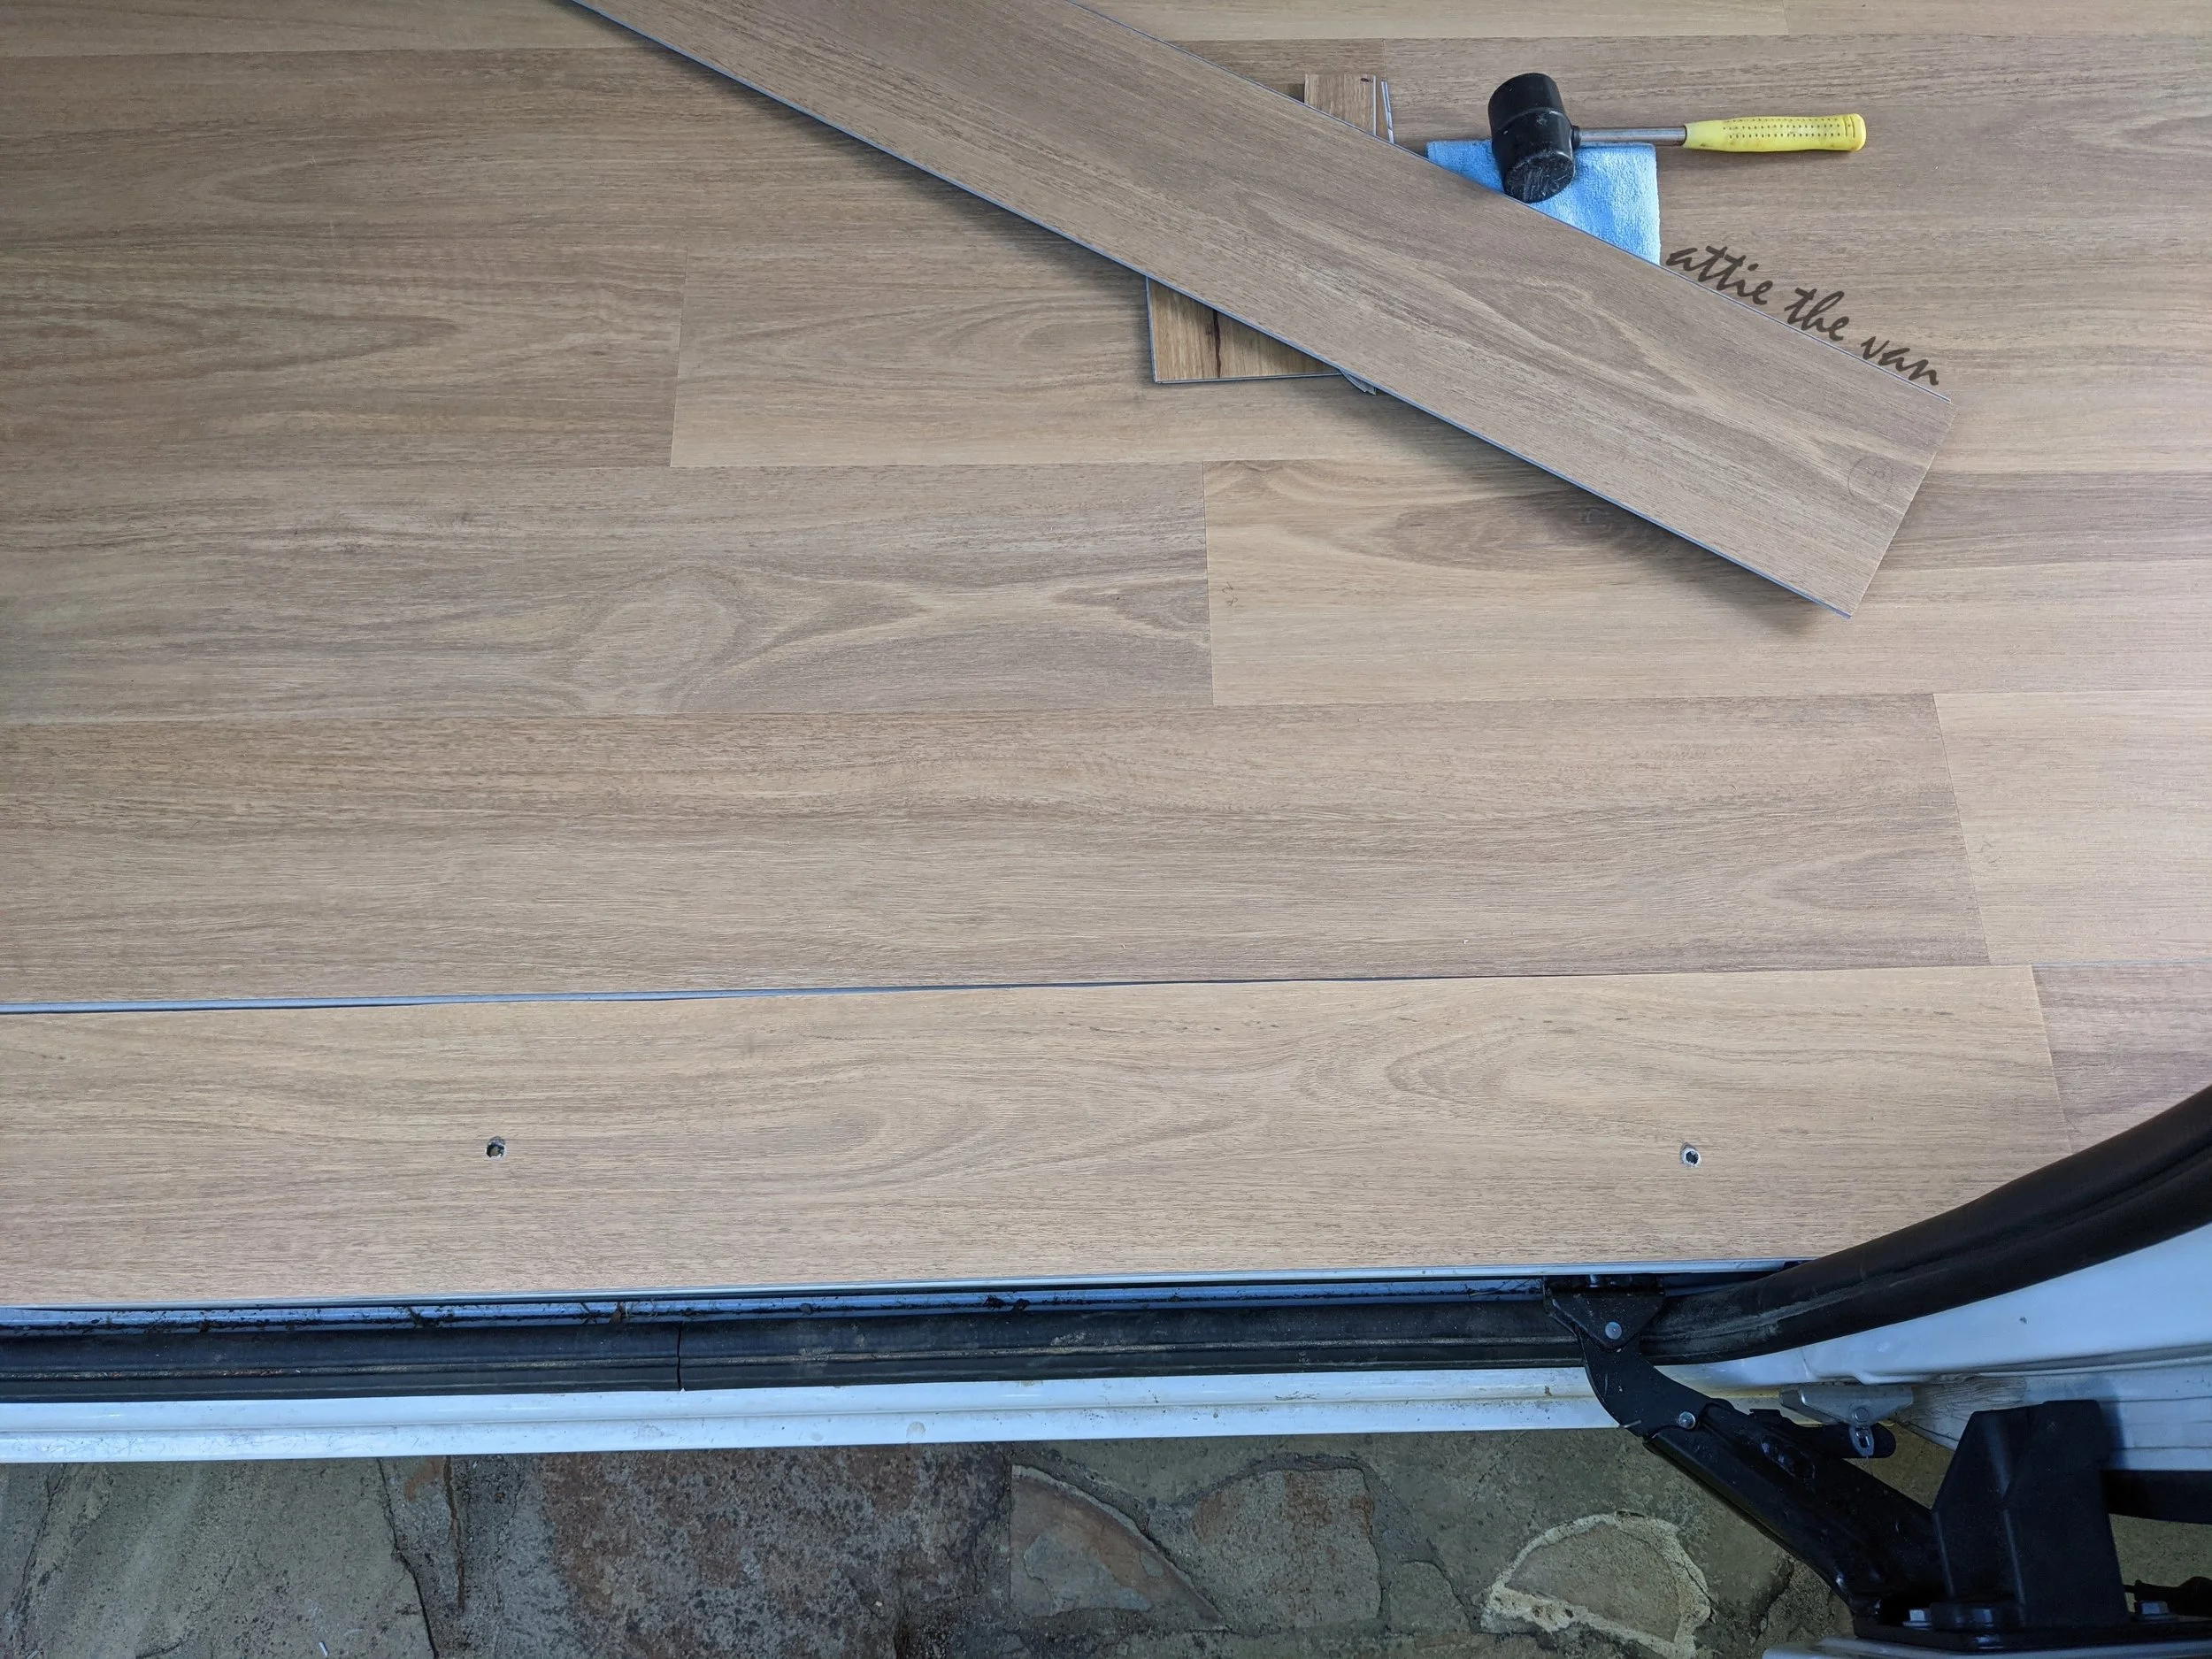
For the first row, we cut a few centimetres off the width of the 1st row planks.
This helped make sure the 10th row (the sliding door end) wasn’t too narrow so it was more secure and looked better next to the previous rows.
We used a template for the wheel arch, and cut this out with the jigsaw.
Also, because we were bolting the floor down in places, we drilled a hole in the first plank for this.
Lay the First Row
For the first row, we made sure to line up the planks so they were straight with the wall, making sure to leave that ~6mm gap.
To do this, we just used offcuts of the hybrid flooring as it’s a convenient 6.5mm thick.
Cut the next planks to size (as needed)
For the following rows, we cut each plank to size.
This involved measuring the length needed.
We then pencilled the cut line with a square and cut each plank with a jigsaw.
(Again, a mitre saw would have been much quicker and more accurate for these straight cuts!)
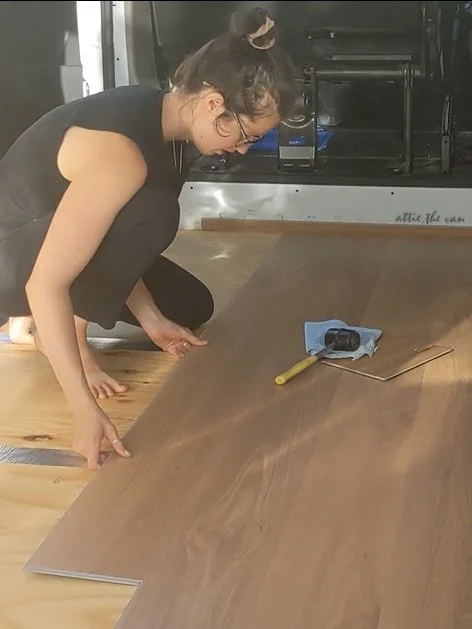
Connect the planks
To connect the planks, they needed to be clicked together.
We slid the planks into place and clicked the long join then the short join.
For the long joins, we couldn’t directly tap the tongue and groove because it would damage it. Instead, we used a scrap piece of hybrid flooring and connected it to the long side. We could then safely tap on the scrap piece to tighten the join. The scrap piece could be easily removed for the next join. There is a proper tool for this, but this is an awesome workaround that helps prevent damage to the tongue and groove mechanism of the plank.
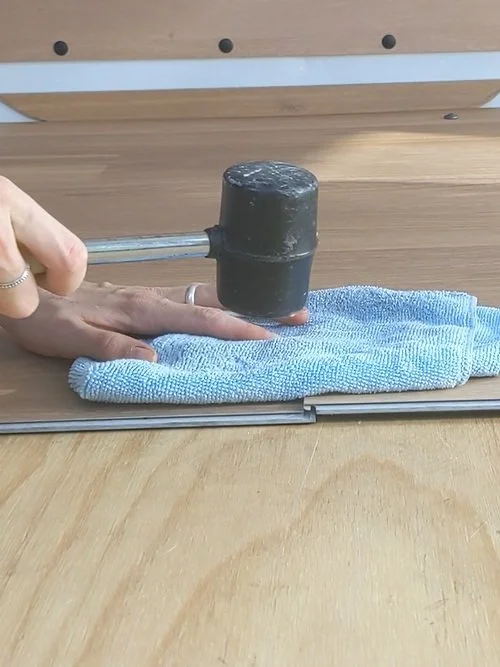
For the short joins, we did the same thing. Then we tapped on top of the join using a mallet and a cloth (for protection) to secure the plank.

Measure

Measure the cut

Cut
Lay it down
Click into place!
After a while, everything was looking good.

Until we made a critical error.
To secure our hybrid flooring and subfloor, we had decided to bolt the floor down in places.
As we were at the end of this multi-day project, I think we were getting tired.
Without thinking, we drilled holes for the bolts into the final plank in the 10th row.
Right at the entry point of our van.
Oops — holes where they should not be.
Not only were these holes ugly, but also very impractical – we’d constantly be catching the bolt as we stepped into the van.
The rule of building is to measure twice (or 15 times) and cut once.
Although even that didn’t save us. Oops.
A big oops really because it was our last plank (in the right colour).
Unfortunately we had to uninstall everything back to the second row, to swap out an Alpine Gum plank and replace with a Blackbutt so we could use the Alpine Gum in the 10th row.
We’re learning to take more breaks to avoid this sort of stuff!
5. Bolting
Once the floor was (finally) installed, we fitted the bolts into the other points in the van that would be hidden by cabinetry.
Note, this is not recommended by the manufacturer, but we wanted to secure the floor well giving it’s in a moving van!
We felt this was safer in case we ever crash so the floor stays attached and doesn’t crush us.
6. Glueing
The small planks we cut to sit behind the wheel arches at the back of the van weren’t very secure given the size, shape, and location of them.
So we used a tiny bit of glue to secure them to the floor.
Again, not recommended by the manufacturer but we thought the benefits outweighed this.
7. Trim
To finish it off, we installed trim.
We spray painted two strip of aluminium floor trim.
Then installed them at the back doors and side door to protect the edges and give it a finished look.
We used stainless steel screws to secure them (to avoid any rusting).

8. Taping
There was the option to trim out the whole floor.
But since it’s all under cabinetry, we decided to seal it with Ametalin tape, an insulation tape that is quick and easy to use.
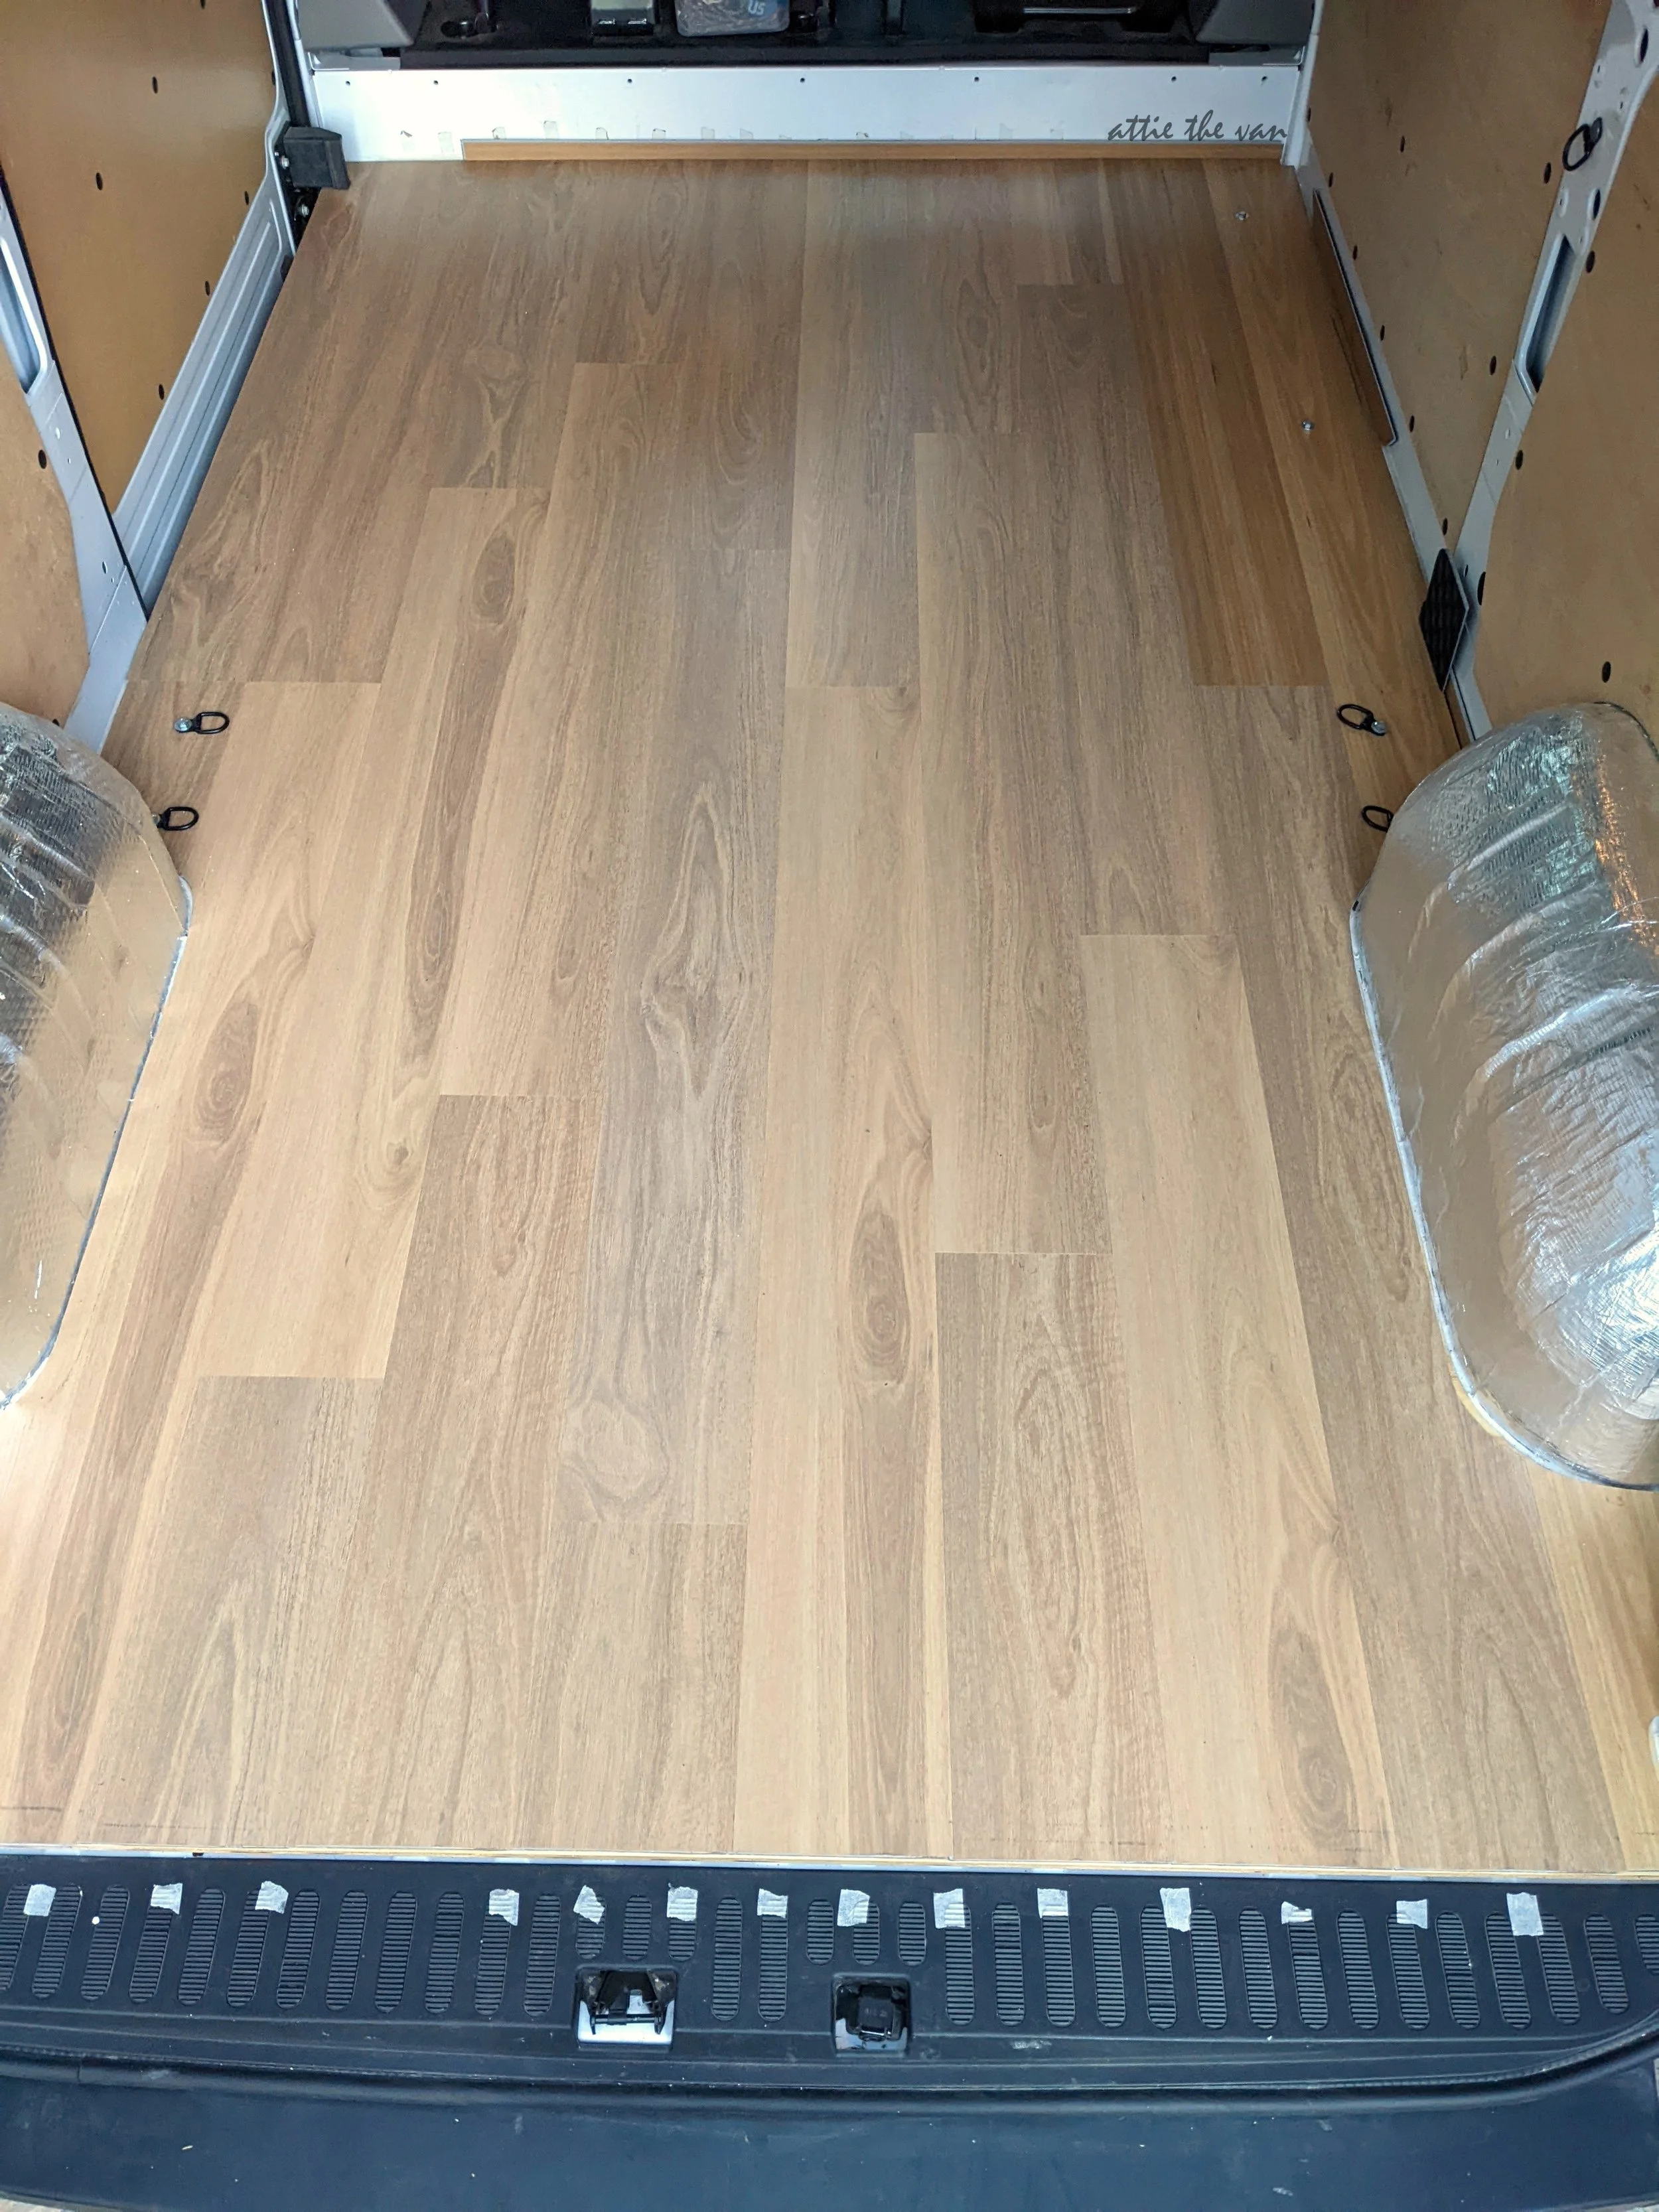
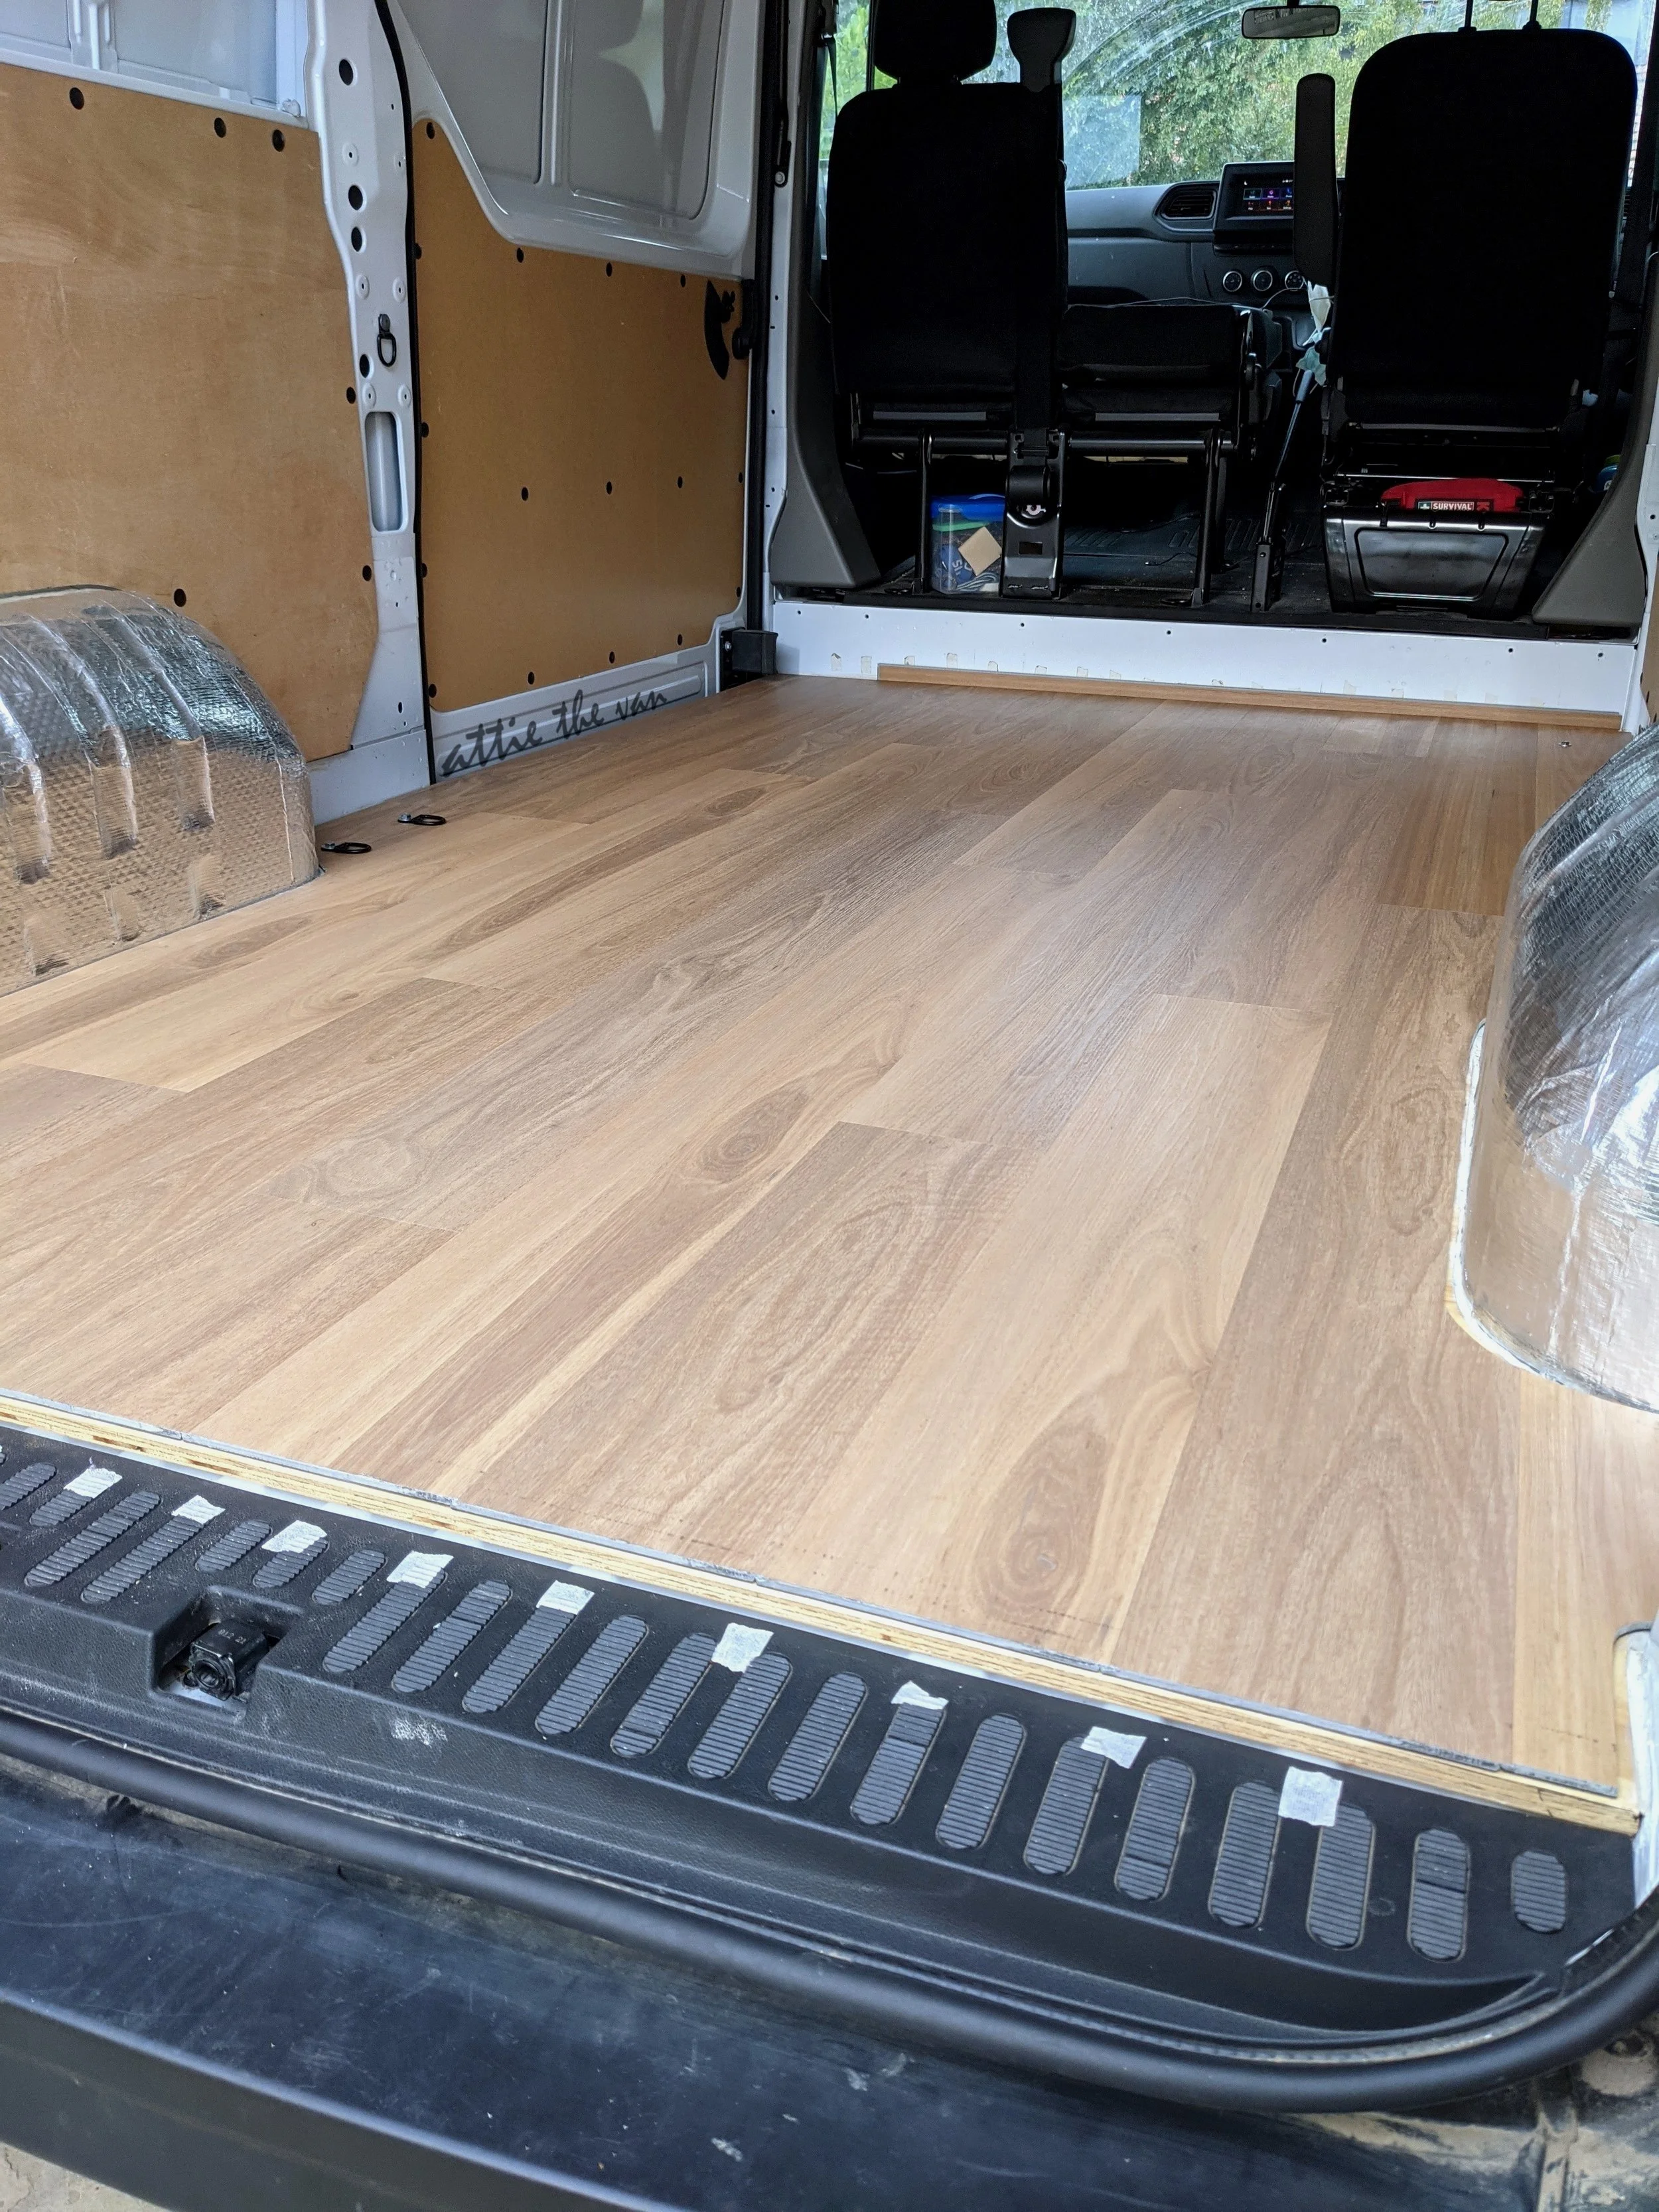
And we love the final result.
In our opinion, hybrid flooring is the best flooring in a van.
Although the ultimate test will be time.
But so far so good!

At the finish line of the flooring install
How Much Does Hybrid Flooring Cost In A Van?
Hybrid flooring is the best of all worlds - it’s beautiful, waterproof, and lightweight.
In total, we spent $436.34 on hybrid flooring for our van.
Although this could probably be a lot less if you went with a cheaper flooring/m2 and picked a different trim!
But we love the results!

Nothing is ever simple.
But the floor is finally in, our minds are clear, and we have a blank canvas for the rest of the build.

A little wiped out at the end of it all!